Integrating MoMo payment into your WordPress sales website helps automatically process orders quickly and securely transact. At the same time, to keep up with the trend of payment via electronic wallet in the future.
Currently, the number of people using e-wallets for shopping and payment transactions is increasing. Among the existing electronic wallets such as MoMo wallet, ViettelPay wallet, ZaloPay wallet, etc., MoMo wallet is still the name chosen by many people.
So when making a sales web, please take advantage of the electronic wallet payment method so that customers can easily and quickly pay money from there to finalize the application faster.

In this article, I will guide you how to integrate MoMo payment into your WordPress sales website. Help you to diversify the payment methods for the web, as well as meet the needs of customers who want to pay through MoMo.
With instructions Integrating MoMo payment into website WordPress below you can set up to Automatically process transactions and activate orders or set up to activate manual orders.
Note: The plugin below Only for WordPress web sales using WooCommerce come on Customizable WordPress sales websites won't work. If you want to make a sales website with WooCommerce, please refer to this SEO sales standard WordPress theme.
Integrating MoMo payments into the web (manual approval)
Advantages
- Currently free
- No need to register MoMo as a business, you can receive payments with your personal MoMo account (hint: sign up for MoMo receive 100K).
- Automatically generate QR codes for orders so customers can scan and pay quickly.
- Manually add a reminder to the customer to fill in the order to know which order it is for.
Limit
- Must manually activate manual orders (suitable for shops selling physical products such as clothing, phone accessories, home appliances, ...)
Installation steps to integrate MoMo payment into the web
Step 1: Download Momo Payment For WooCommerce plugin from the link below and install it on the web.
(*) Link to download free MoMo payment plugin
Step 2: After installing and activating the plugin, you access the menu WooCommerce -> Establish. Then select the tab Pay and click on Setting at the checkout Momo e-wallet.

Step 3: Set up payment information with MoMo wallet for your website as follows:

Inside:
- Toggle: Check this item to activate form of payment via MoMo
- Title: The name of the payment information is displayed in the payment section
- Describe: More detailed description of payment methods via MoMo
- Momo phone number: Is the phone number used to register your MoMo account. You need to fill in the correct phone number to receive money.
- MoMo account name: Is the full name displayed in the MoMo wallet.
- Email MoMo account: The email address associated with your Momo account.
- Display structure: A structure showing instructions and QR Code for users to scan for payment. Inside,
{{qrcode}}- show QR code (required),{{order_id}}- the order code helps you know which order it is for.
After setup is complete you remember to save. Then go out to test website.
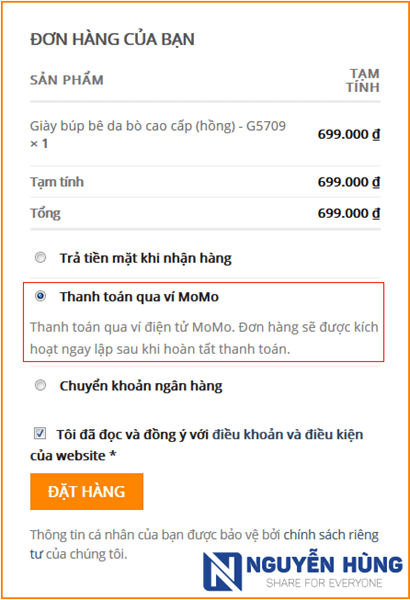
At the payment page, you will see more payment methods via MoMo wallet.
Notice of successful order with QR Code display for customers to scan and pay via MoMo.

That's it Whenever customers order and choose to pay via MoMo on the web, you just need to wait for money to MoMo account and activate manual orders for customers.
Integrate MoMo payment into the web (automatic menu approval)
Advantages
- Automatically process orders without manual confirmation (suitable for shops selling digital products such as hosting, ebooks, software, themes, online courses, ...)
- No need to sign up for MoMo as a business - get paid by personal account.
- Automatically generate QR codes for orders so customers can scan from MoMo and pay quickly.
- Add a reminder to the customer to fill in the order to find out which order it is for.
- Can set automatically discount% when paying by MoMo
Limit
- High plugin purchase cost (however expensive)
Set up payments with MoMo for the web
Step 1: Install the xMomo Payment plugin to the web. Contact me to Buy this plugin.
Step 2: Go to the menu WooCommerce -> Establish. Then select the tab Pay and click on Setting at the payment method xMomo Payment You will see the following settings table.

Inside:
- Toggle: Tick to activate payment method via Momo.
- Payment gateway title: The name shows the payment method in the payment section
- Notice to customers: Enter a description of the payment method
- Order status after order: You can set to "Completed" to automatically activate orders after payment.
- Syntax of payment: Content notes at checkout to determine which order is paid. Inside
%ORDERID%- code orders,%AMOUNT%- payment amount. - Momo account: Is the phone number of a personal Momo account.
- Full name: The full name displayed in your Momo account.
- Email address: The email address associated with your Momo account.
- The file name contains the data: Is the file name to store transaction data on Momo
It is done. The other steps you follow are the same instructions for the manual payment method above.
Epilogue
Above I just showed you 2 ways integrate Momo payments into the web WordPress sales using WooCommerce. Depending on what your website sells, choose one of the two plugins accordingly.
If you find the article useful, like and share the article to your friends. Maybe they also need it. At the same time, each share will motivate me to write more sharing.

0 Comments